R2lab registration
Introduction
First of all, welcome to R2lab; you are now part of a community of researchers that use R2lab for their experiments, and we hope you will enjoy it.
You will do most of your interactions with R2lab through the Reservation Portal at https://r2lab.inria.fr : is the one used for daily operations, like getting a reservation, and live monitoring of nodes status.
Since 2017 April, you can also manage your ssh keys from this site.
Entry point
Since March 2026, this site also manages user registration; click the 'Signup' link on the landing page to get to the registration form.

Fig. the 'Signup' link on the landing page
at that point just fill in the form, shown below.
please pay special attention to:
- the 'Your details' section; please provide as much background information as possible; this is the data upon which we will decide to accept or reject your registration request !
- the outlined checkbox: we appreciate that you are willing to cite the testbed in the event where you'd publish a paper that involved R2lab
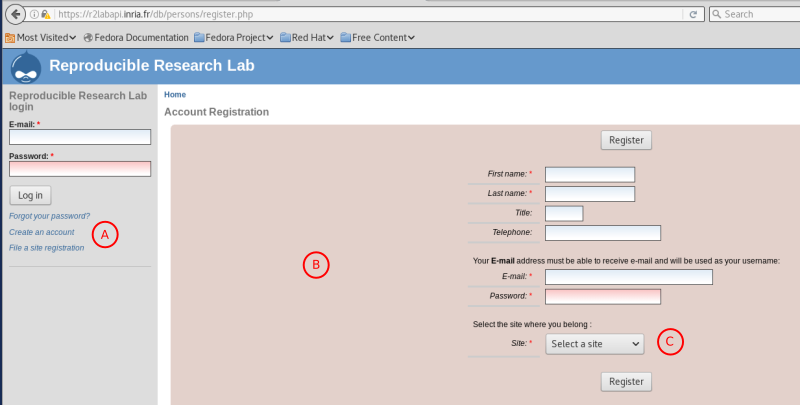
Fig. the registration form
Once you register, and confirm your email address by acknowledging the confirmation email, an administrator will review your request, and decide to accept or reject it.
Upon acceptance, an email will be sent to confirm your subscription; it will contain
- instructions to pick a password
- the name of the slice that you can use to log in into the testbed
From that point you can login into the Reservation Portal and you are almost ready to go, but you still need to upload an SSH key before you can do anything useful. Let's move to the next tab to do that.
(Note that due to former abuse, we do not send an email in the case of a rejection; if after a few days you believe your request has been rejected by mistake, please contact us directly on the R2lab support mailing list)
Uploading your SSH public key to R2lab
Before you can start using the R2lab testbed, you'll need to upload your SSH public key to R2lab. For this, let's follow 2 steps.
1 - Generating an RSA key pair
If you do not have a public key already, type in your terminal:
$
ssh-keygen -t rsaOnce you have entered the
ssh-keygencommand, you will get a few more questions. To simplify, you can press enter and use the given default values.The entire key generation process looks like this:
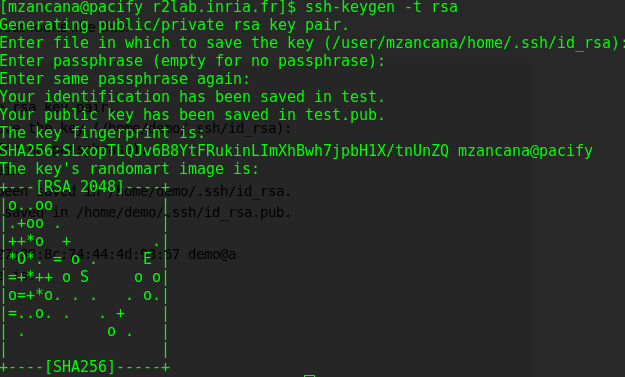
Fig. - Generating a key pairThe public key is now located under your home directory in
~/.ssh/id_rsa.pub
2 - Upload your public key
In order to send us your public key, point your browser at the r2lab website, then:
Log in your account using the email/password you already created;
Once inside your account, go to either the BOOK or RUN pages, and click the "slices & keys " link (fig 3, A), which will pop a dialog dedicated to managing your slices and keys. If your public key is not listed there, use the "Select public key file to add" button (fig 3, B) to choose the file that contains your public key, that will then be uploaded.
Please note:
if you are not familiar with ssh keys, please be careful to always select the public key; the private key, as its name clearly states, is not supposed to be uploaded anywhere;
in general, the key pair is located under a hide folder (
../.ssh/). In the browser view, after click browse button , enable the hide file options view to find it;under Windows, we have experienced issues when dealing with keys originating from the
puttyapplication; if this is your case we recommend that you generate another key pair with a more standard format.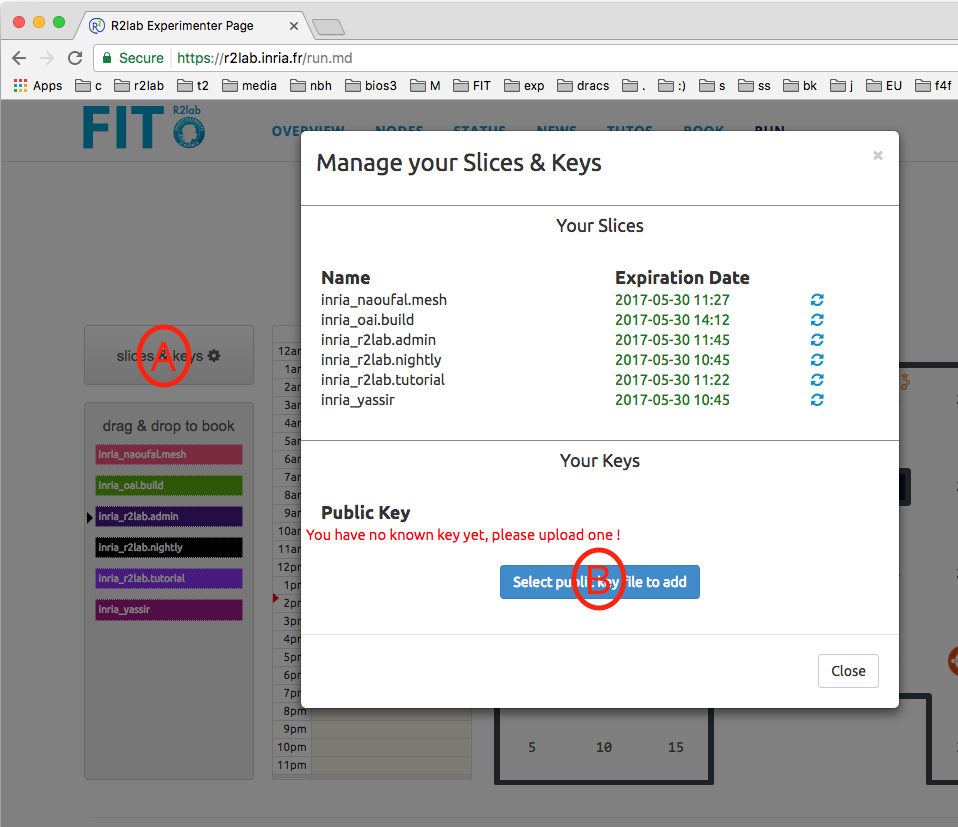
Fig. - Uploading your SSH key
Once this is done, you should see something like this figure
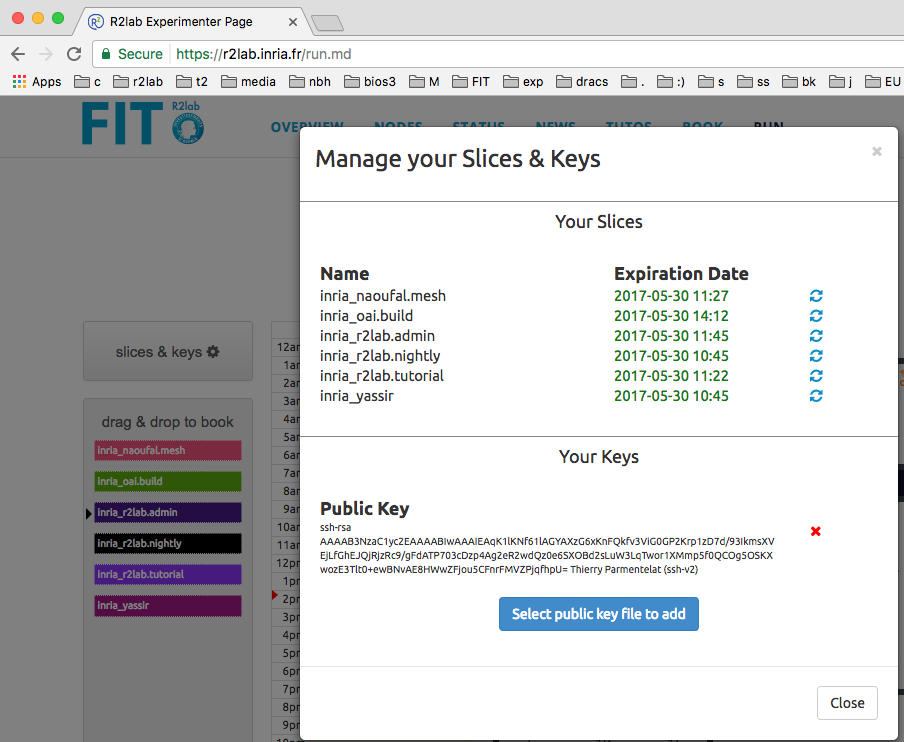
Fig. - An uploaded SSH key
You can then move to the next tab to book your slices in R2lab.
Make the reservation
In order to use R2lab, you must reserve the testbed. The right way to do this is using our Reservation Portal - UI. However, you must be logged in to see the reservation page.
Once in private area, just drag and drop the slice into the day calendar - see (A) and (B) below
If you want dates in future, do the same action as described above but in the Reservation Portal - Calendar.
Other actions you can do in the calendar:
If you want to remove or cancel your booking, just use double click in the slice already booked;
if you want to move the slice booked, drag and move the slice;
if you want to increase or decrease in hours the duration of your slice, just click and drag in the tiny line placed on the botton of each slice.
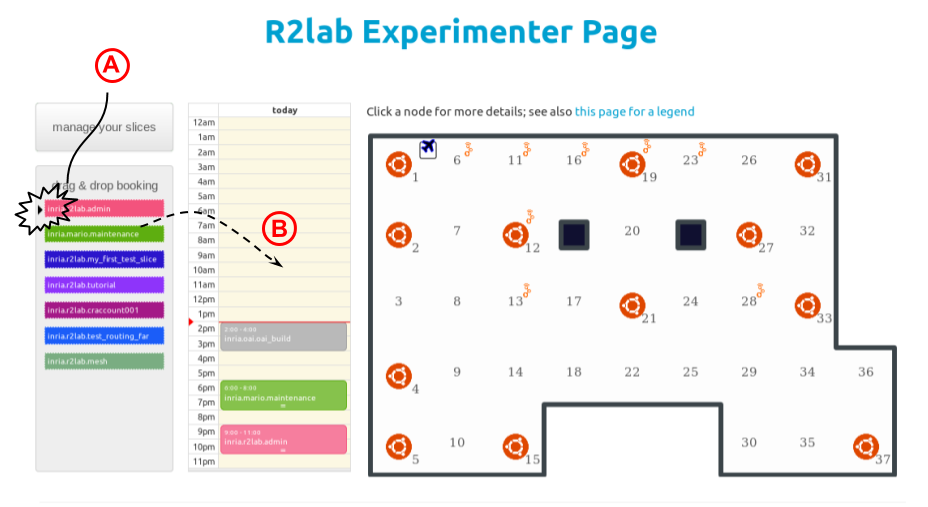
fig. 5 - Booking a slice in R2lab
When this is done, you can move to the next tab to access R2lab platform and run your tests.
The ssh agent
This step is optional, but worth reading for beginners.
When accessing R2lab, you will be authenticated through ssh. Your public key is installed and authorized on the R2lab end, and in order to establish that you are who you claim to be, you (i.e. your computer) will be challenged so as to prove that you can access the corresponding private key.
When multiple ssh connections are created, it is traditionally easier to run an ssh agent. The role of this software, that runs locally on your laptop, is to work as a cache of private keys, so that you only need enter the password for your private key once when you log in into your laptop, rather than each time an ssh session is created - which can happen a lot.
This is why, before you try to enter the R2lab gateway using your slice, we recommend that you add your ssh private key in your ssh agent, for example
# in order to list the keys currently loaded in the agent $ ssh-add -l # in order to add one $ ssh-add -K ~/.ssh/id_rsa
Your Unix account
The name that you need to use to enter the testbed using SSH is the name of the unix account that has been created for you. The name of this unix account is simply the slice name.
For example, in this tutorial we have used the following names:
slice name :
r2lab-tutorialunix account / full slice name:
r2lab-tutorial
At this point you should reach R2lab platform typing in your terminal:
$ ssh your_slicename@faraday.inria.fr
if by any chance your public key is not at its standard location, and not known to your ssh agent, then place
-i option in the command line to specify its path.
Once this command works for you, proceed to the next tutorial, where we see in more details the available tools for manipulating the nodes.
Problems?
Feel free to contact us on the R2lab users mailinglist fit-r2lab-users@inria.fr if you experience trouble with ssh-logging into the R2lab gateway at faraday.inria.fr, or with running your experiments, and/or none of those hints are helpful.